It’s almost becoming a series about UTM, my quest of finding replacements for tooling I used on my Intel based MacBook Pro. This time a little article about how I’m using UTM as a replacement for my usage of Vagrant.
I’m using a “base” UTM virtual machine which has been configured with a Debian installation. This installation has been tweaked with things like adding my public key to the authorized_keys and installing tools I like to have available.
The last step in tweaking the “base” machine is adding the following rc.local file.
#!/bin/sh
#
# rc.local
#
# Version 1.1

PATH=$PATH:/usr/bin

# Mount Share
mount -t virtiofs share /mnt/

# Mount Rosetta
mount -t virtiofs rosetta /media

#Enable Rosetta
/usr/sbin/update-binfmts --install rosetta /media/rosetta \
     --magic "\x7fELF\x02\x01\x01\x00\x00\x00\x00\x00\x00\x00\x00\x00\x02\x00\x3e\x00" \
     --mask "\xff\xff\xff\xff\xff\xfe\xfe\x00\xff\xff\xff\xff\xff\xff\xff\xff\xfe\xff\xff\xff" \
     --credentials yes --preserve no --fix-binary yes

#Give the system some time to settle
sleep 5

#Add ip adress for ansible
export MYIP=$(hostname -I | cut -d ' ' -f 1)
cat > /mnt/environment/hosts << EOF
[utm]
${MYIP}
EOF

#Create simple login
echo "ssh root@${MYIP}" > /mnt/environment/open_shell.sh
This rc file enables Rosetta (might come in handy), mounts the shared folders and makes the machine “known” by writing two files in a special shared folder.
I clone this “base” machine towards the machine I want to use for my project.
The UTM has machine has in case of one of my projects the following shared folders:
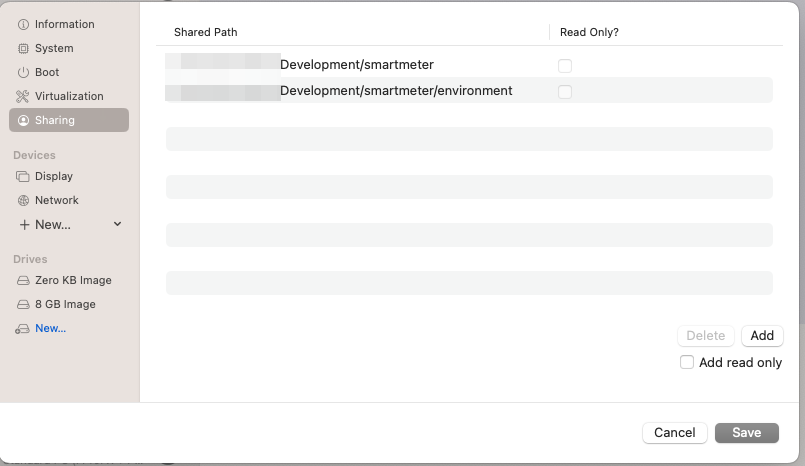
As you can see one of the folders ends in “environment”. This folder is being used by the rc.local file to write the files for making the machine “known”. The following files are added to the folder:
- hosts
This file is being used by Ansble, which I use for further configuration - open_shell.sh
Contains the ssh command to open a shell to the machine
Once the machine has booted up I can quite easily configure it by using Ansible via the command ansible-playbook -e hostgroup=utm -i $(pwd) smartmeter.yml
Because the hostgroup utm has been created by the rc.local file in the hosts file, Ansible can find the host. And because my ssh-key is known (added when I seeded the base machine) it can connect to it and perform the actions specified in the smartmeter.yml file. The yaml file contains the set-up for a PHP project.
- name: Smartmeter configuration
  hosts: '{{ hostgroup }}'
  remote_user: root

  tasks:
  - name: Update apt
    apt:
      update_cache: yes

  - name: Add all required packages
    apt:
      name:
        - rng-tools
        - php-fpm
        - postgresql
        - php-pgsql
        - php-dom
        - unzip
        - php-curl
      state: present
As you can see it’s just a standard Ansible yaml file. The “trick” is the variable at the top of the file “{{ hostgroup }}”. This variable is specified within the call to Ansible.
Opening a shell is also quite easy, just execute . open_shell.sh (note the dot in front of the command). Because the ssh command is added to the open_shell.sh during start-up of the machine an ssh connection is opened automagically.
Note: I’m making use of a connection as “root”. If you prefer a restricted user you need to do some additional set-up.
It’s different from Vagrant, but it is an easy to use solution.